Hey, thanks for coming to the Vuo talk at IMERSA 2018! Here are some resources to help you get started using Vuo to build custom dome media and immersive experiences.
Feel free to contact us if you have any questions.
Getting started
In addition to the links on the Getting Started page, y’all might be interested in our talk on making music visuals in a planetarium — part 1: hardware and software, part 2: building a video mixer, part 3: building an audio analyzer, part 4: building 3D graphics.
Vuo runs on macOS 10.8 and up. We plan to support other operating systems in the future. The Vuo community helps decide our future plans through feature requests and voting.
Free trial, Vuo, and Vuo Pro
What can you do with domes using each of these tiers?
- Free trial — You can open and run compositions as long as they don’t contain Pro nodes. You can create and modify compositions. But you can’t save compositions or export movies.
- Vuo — You can do everything in regular Vuo that you can in the free trial, plus save and export. You can create 2D or 3D imagery without fisheye warping, for a wide variety of abstract or geometric effects. (Tip: Use the
Vignette Imagenode to add a circular frame.) - Vuo Pro — You can do everything in Vuo Pro that you can in regular Vuo, plus you get access to Pro nodes including
Make Fisheye Camera,Make Targeted Fisheye Camera, andWarp Image with Projection Mesh. For a complete listing of Pro features, see the buy page.
Without installing Vuo at all, you can try our apps demonstrating the fisheye camera, targeted fisheye camera, and projection warping.
Playing a dome master video
Playing a dome master (fisheye) video is just like playing any other video in Vuo — you use the Play Movie or Decode Movie Image node.
Vuo’s example compositions show the basic usage of these nodes. Under File > Open Example > Video, see Play Movie, Play Movie with Sound, and Skim Movie.
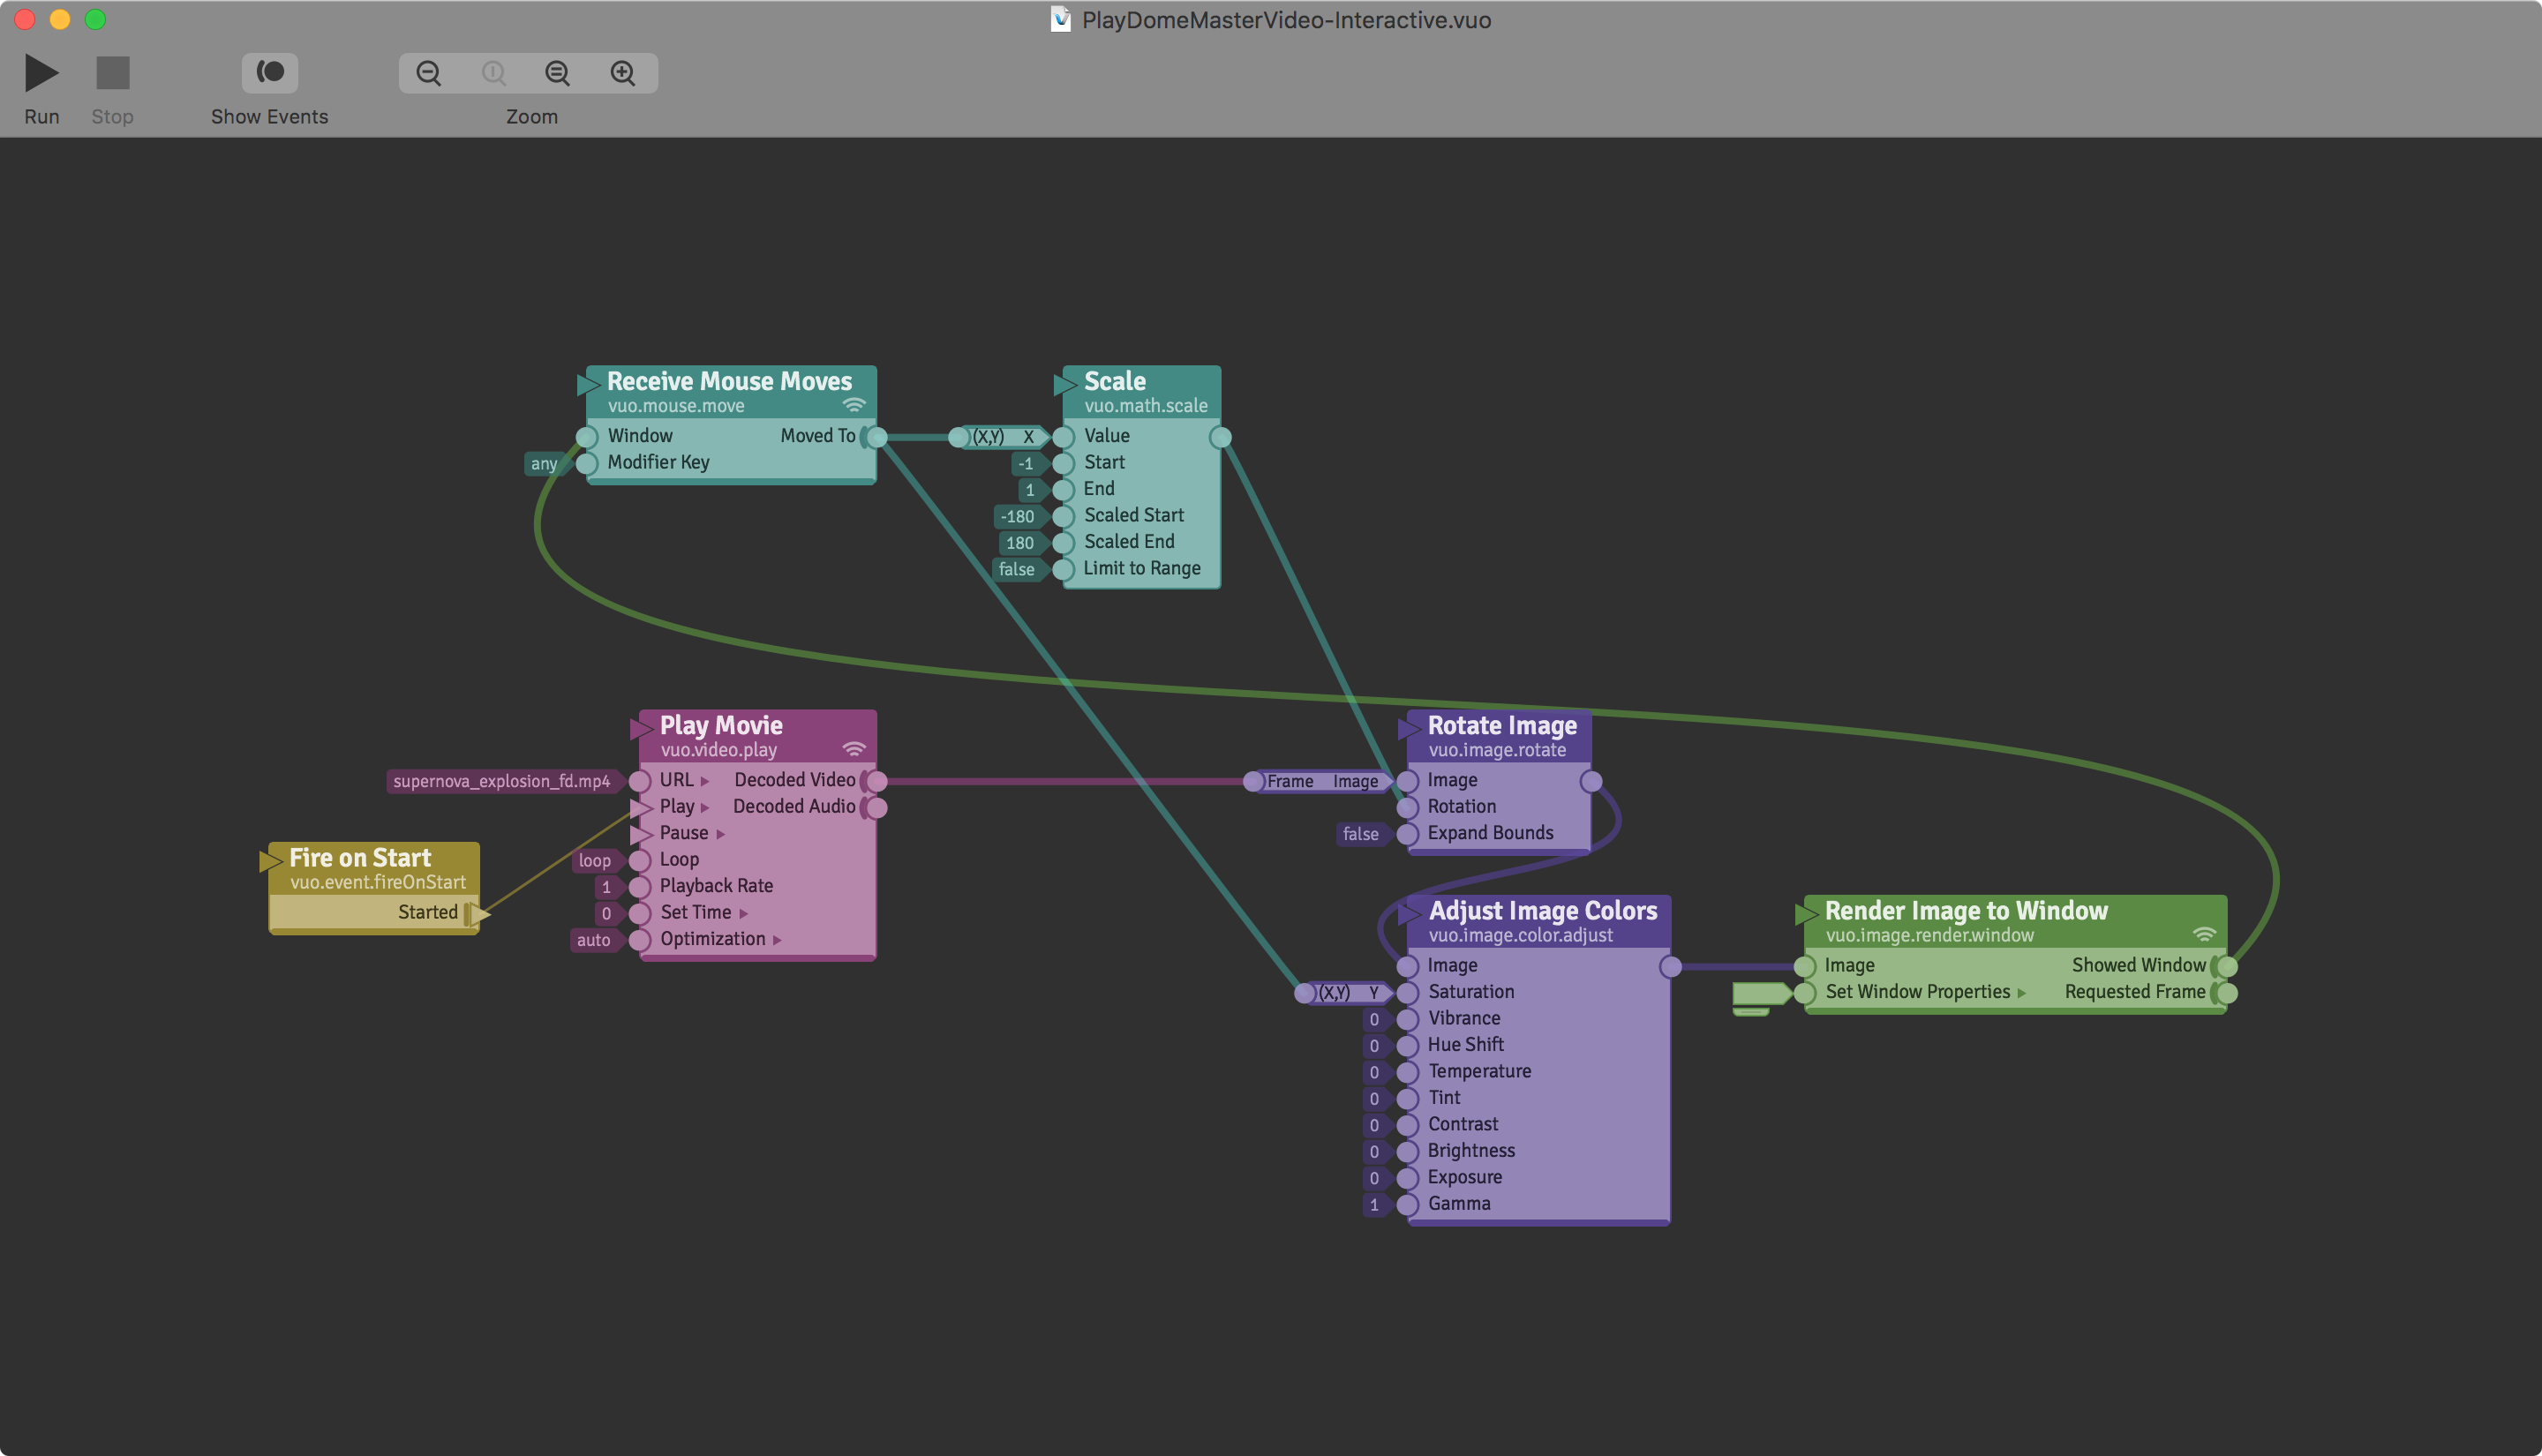
The example below goes a little further. It plays a dome master movie that you can interact with using your mouse or trackpad. Moving left and right rotates the video, and moving up and down adjusts the saturation.
You can run this composition in the Vuo free trial. You’ll need a dome master video to play. Either you can download supernova_explosion_fd.mp4 (by ESA/Hubble, L. Calçada, Nick Risinger) and place it in the same folder as the composition (.vuo file), or you can drag a video that you already have on your computer onto the Play Movie node’s URL input port.
Download composition: PlayDomeMasterVideo-Interactive.vuo
Viewing an equirectangular panorama
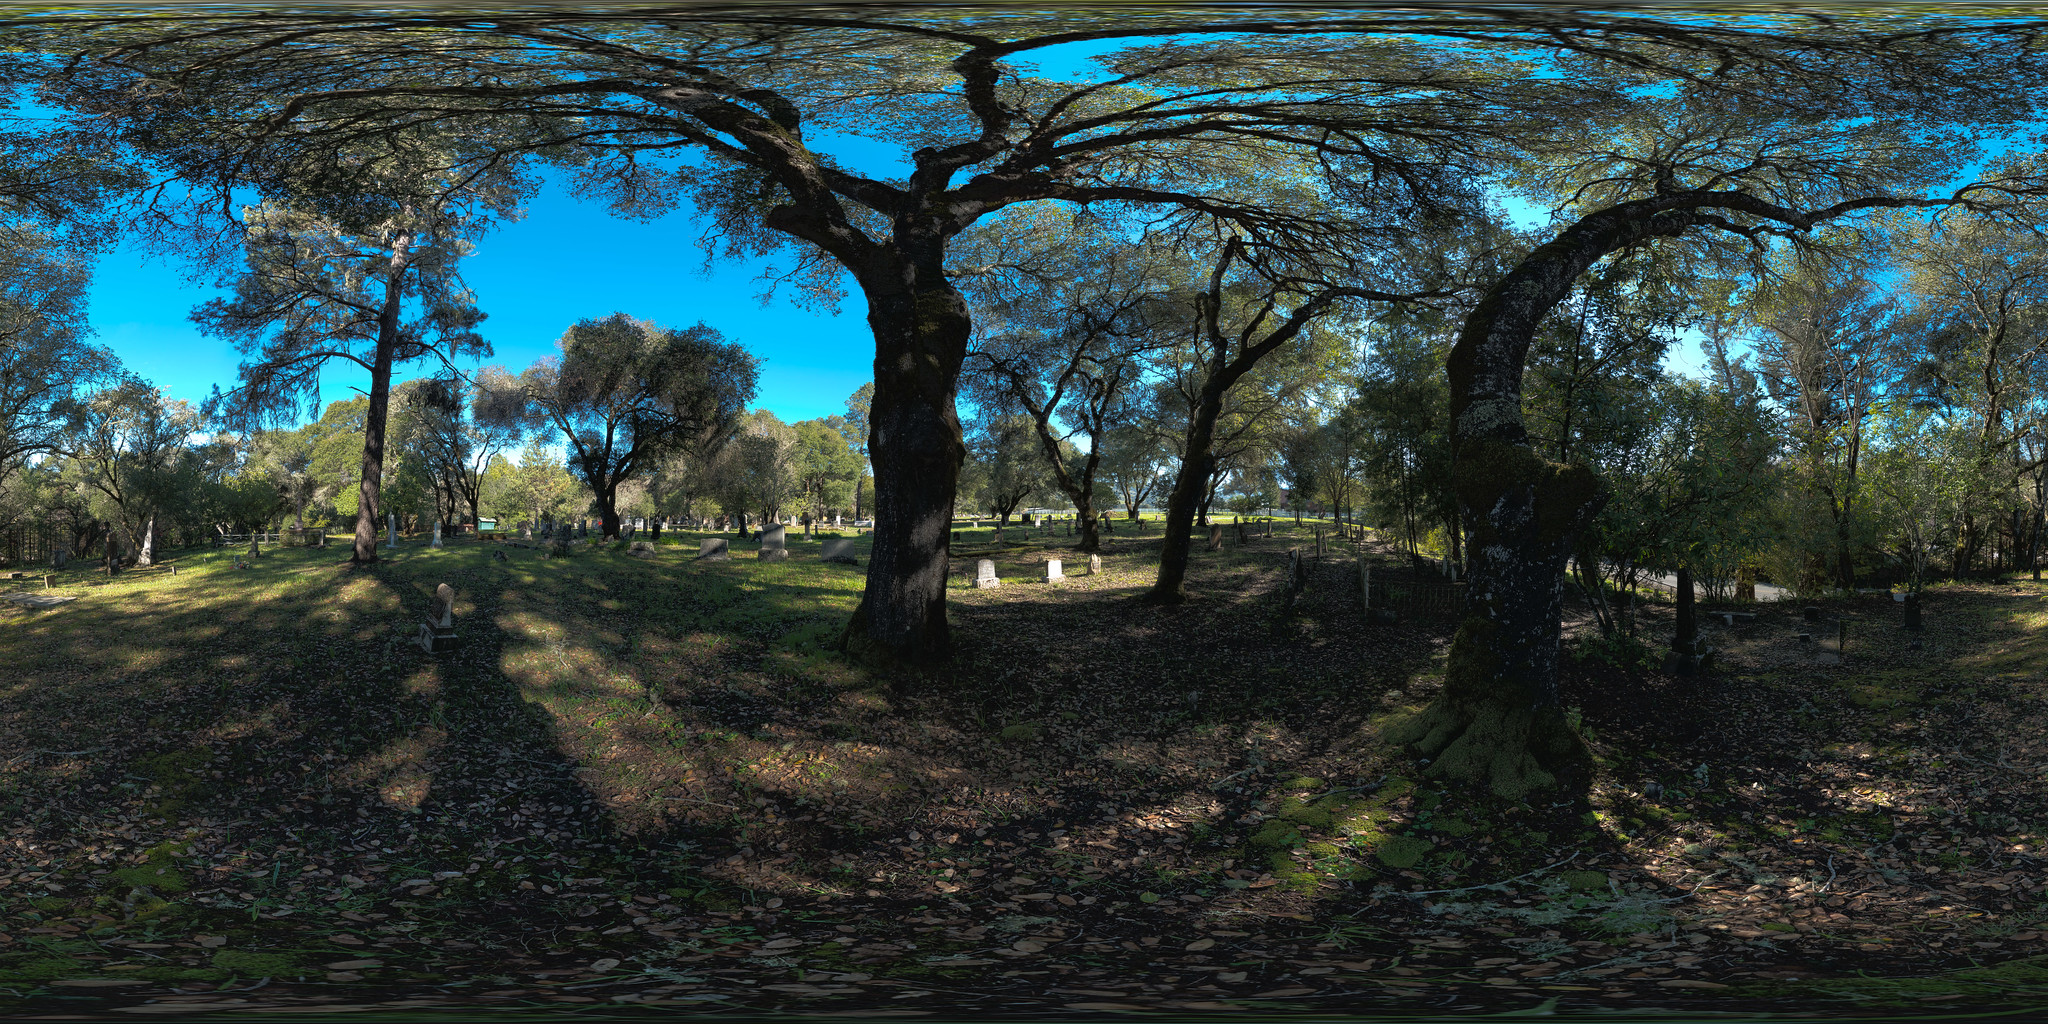
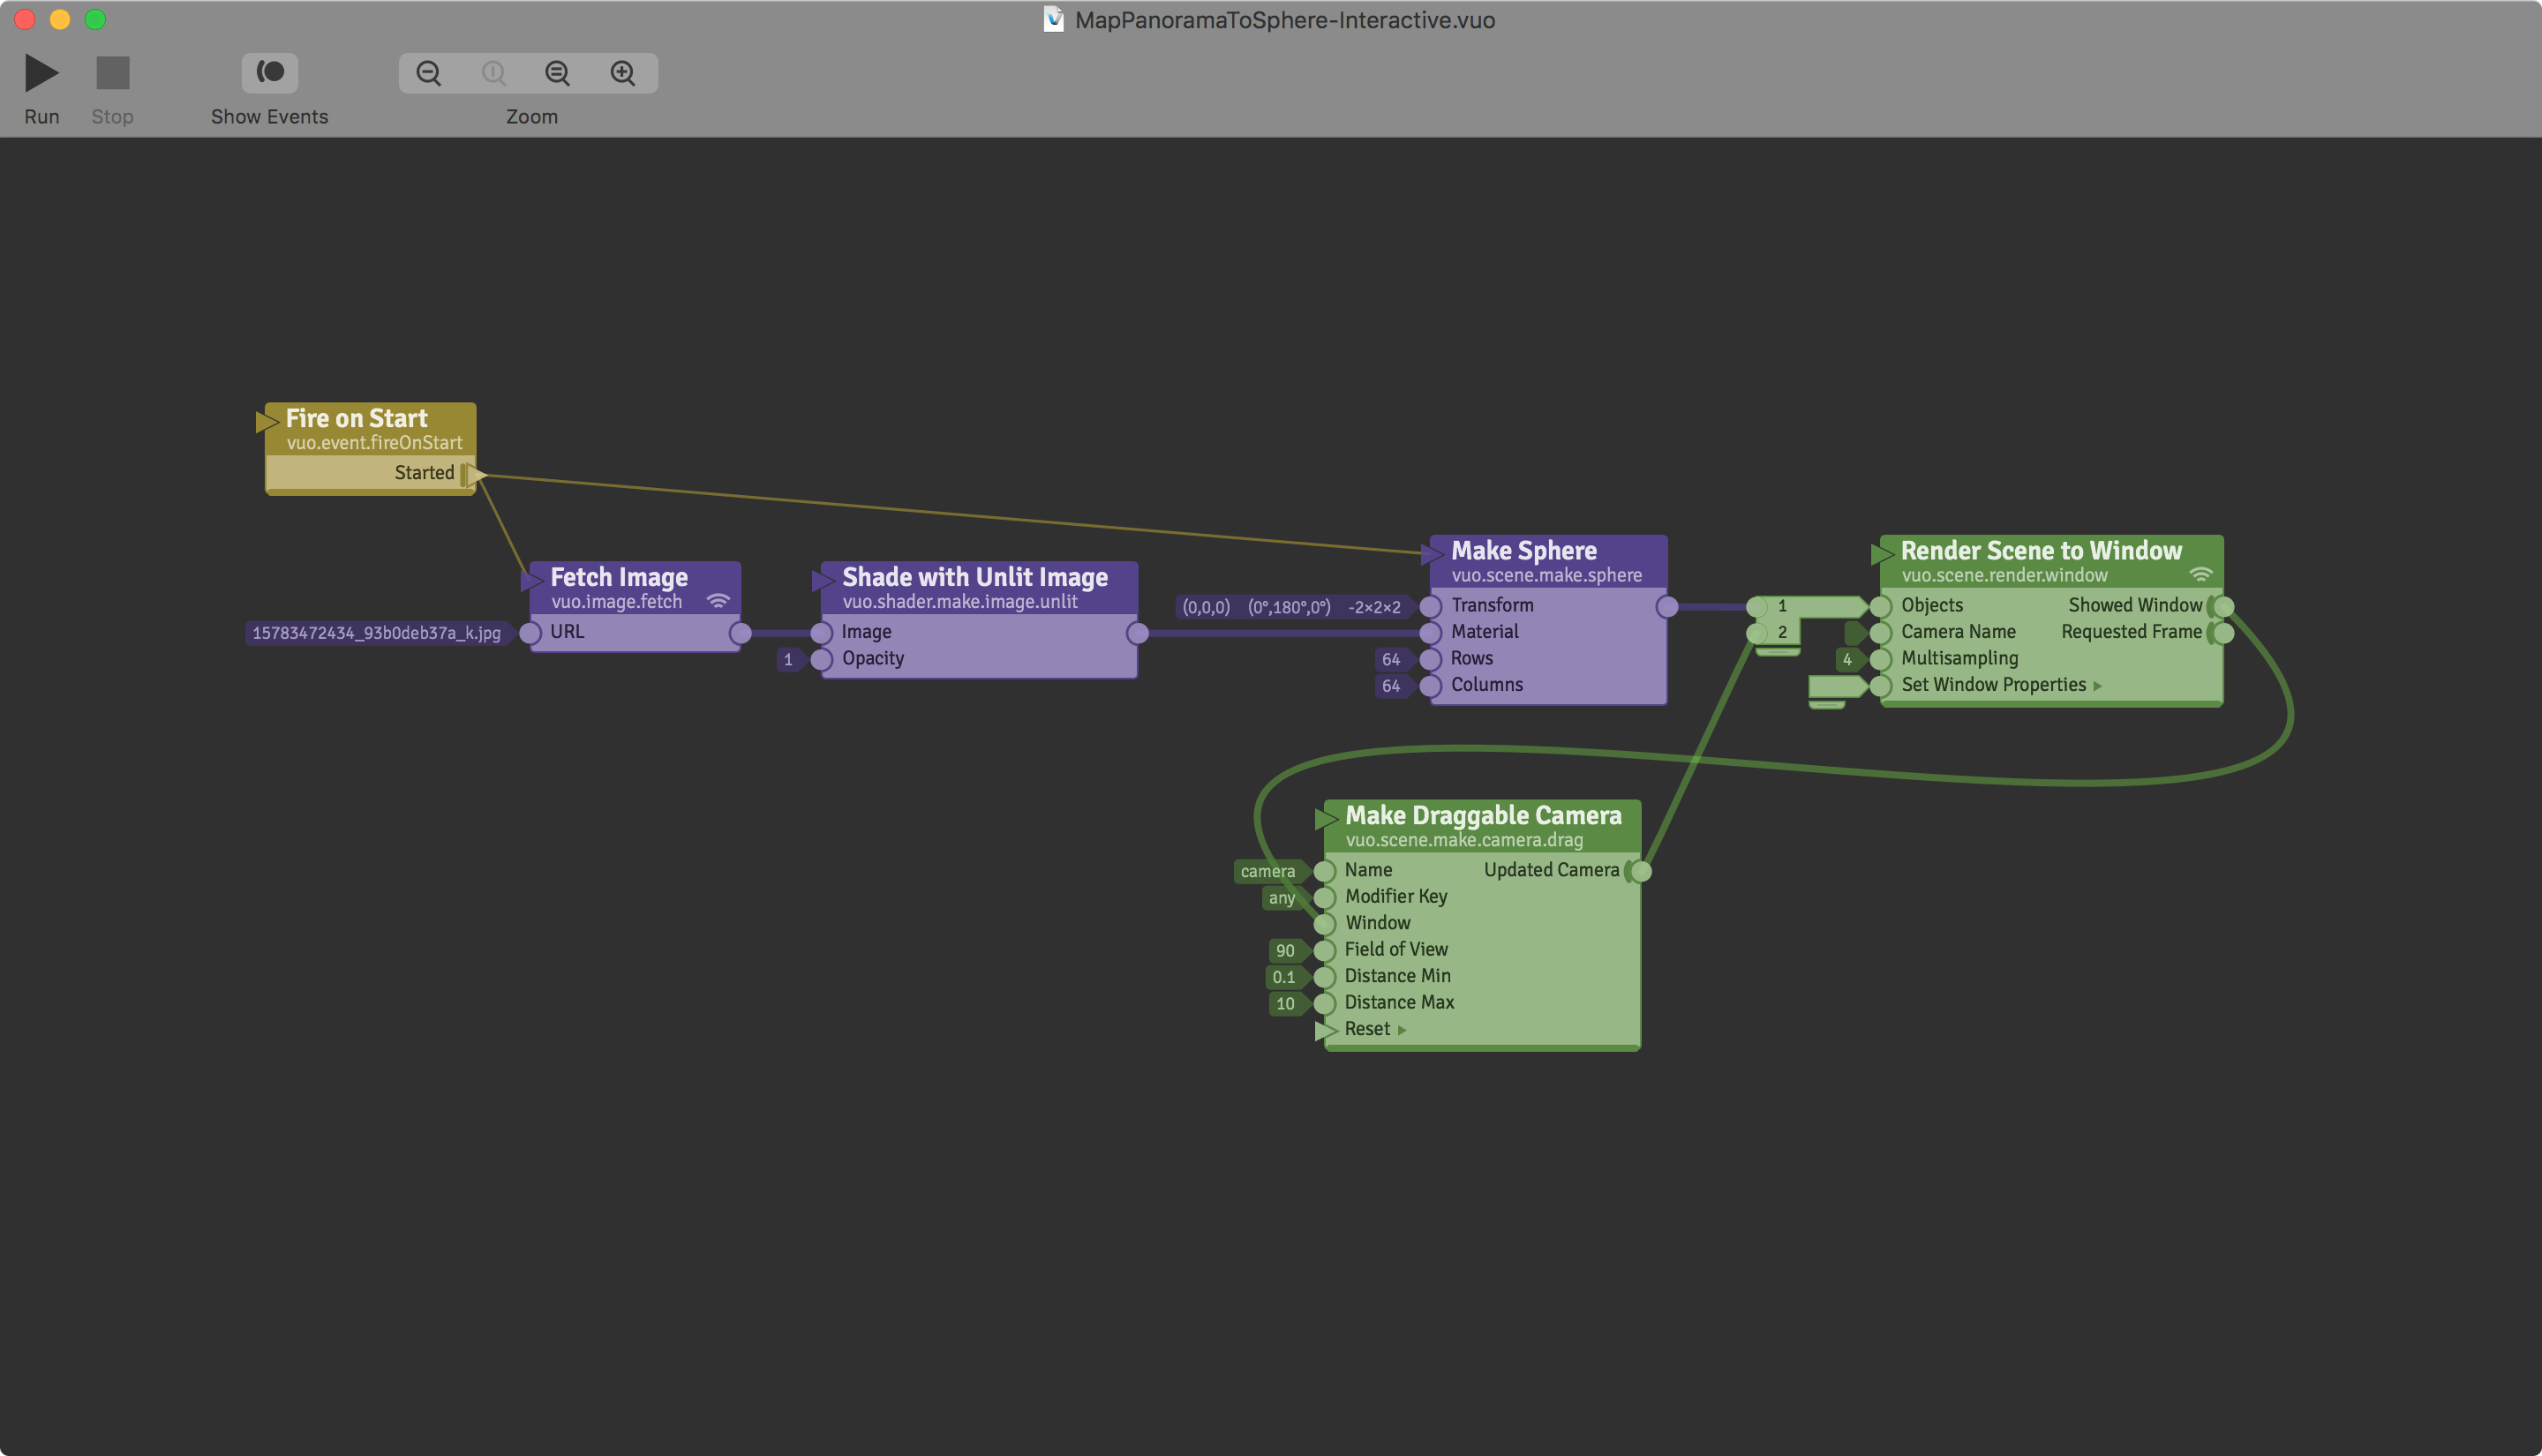
You can view an equirectangular panorama (360° image) in Vuo by wrapping it around a sphere and placing a virtual camera inside the sphere.
In the composition below, dragging with the left mouse button rotates the camera to look in different directions.
This composition uses a little trick to paint the panoramic image on the inside surface, instead of the outside surface, of the sphere. The Make Sphere node’s x-scale is set to -2 instead of 2. This is an alternative to using the Show Back of Object node, described in the next example.
You can run this composition in the Vuo free trial. For the panorama image, either you can download 15783472434_93b0deb37a_k_d.jpg (by Bob Dass) and place it in the same folder as the composition (.vuo file), or you can drag a video that you already have on your computer onto the Fetch Image node’s URL input port.
This composition is a simplified version of 360° image/movie viewer.
Download composition: MapPanoramaToSphere-Interactive.vuo
Rendering latitude and longitude markings on the dome
This example requires Vuo Pro, since it uses the Make Targeted Fisheye Camera node.
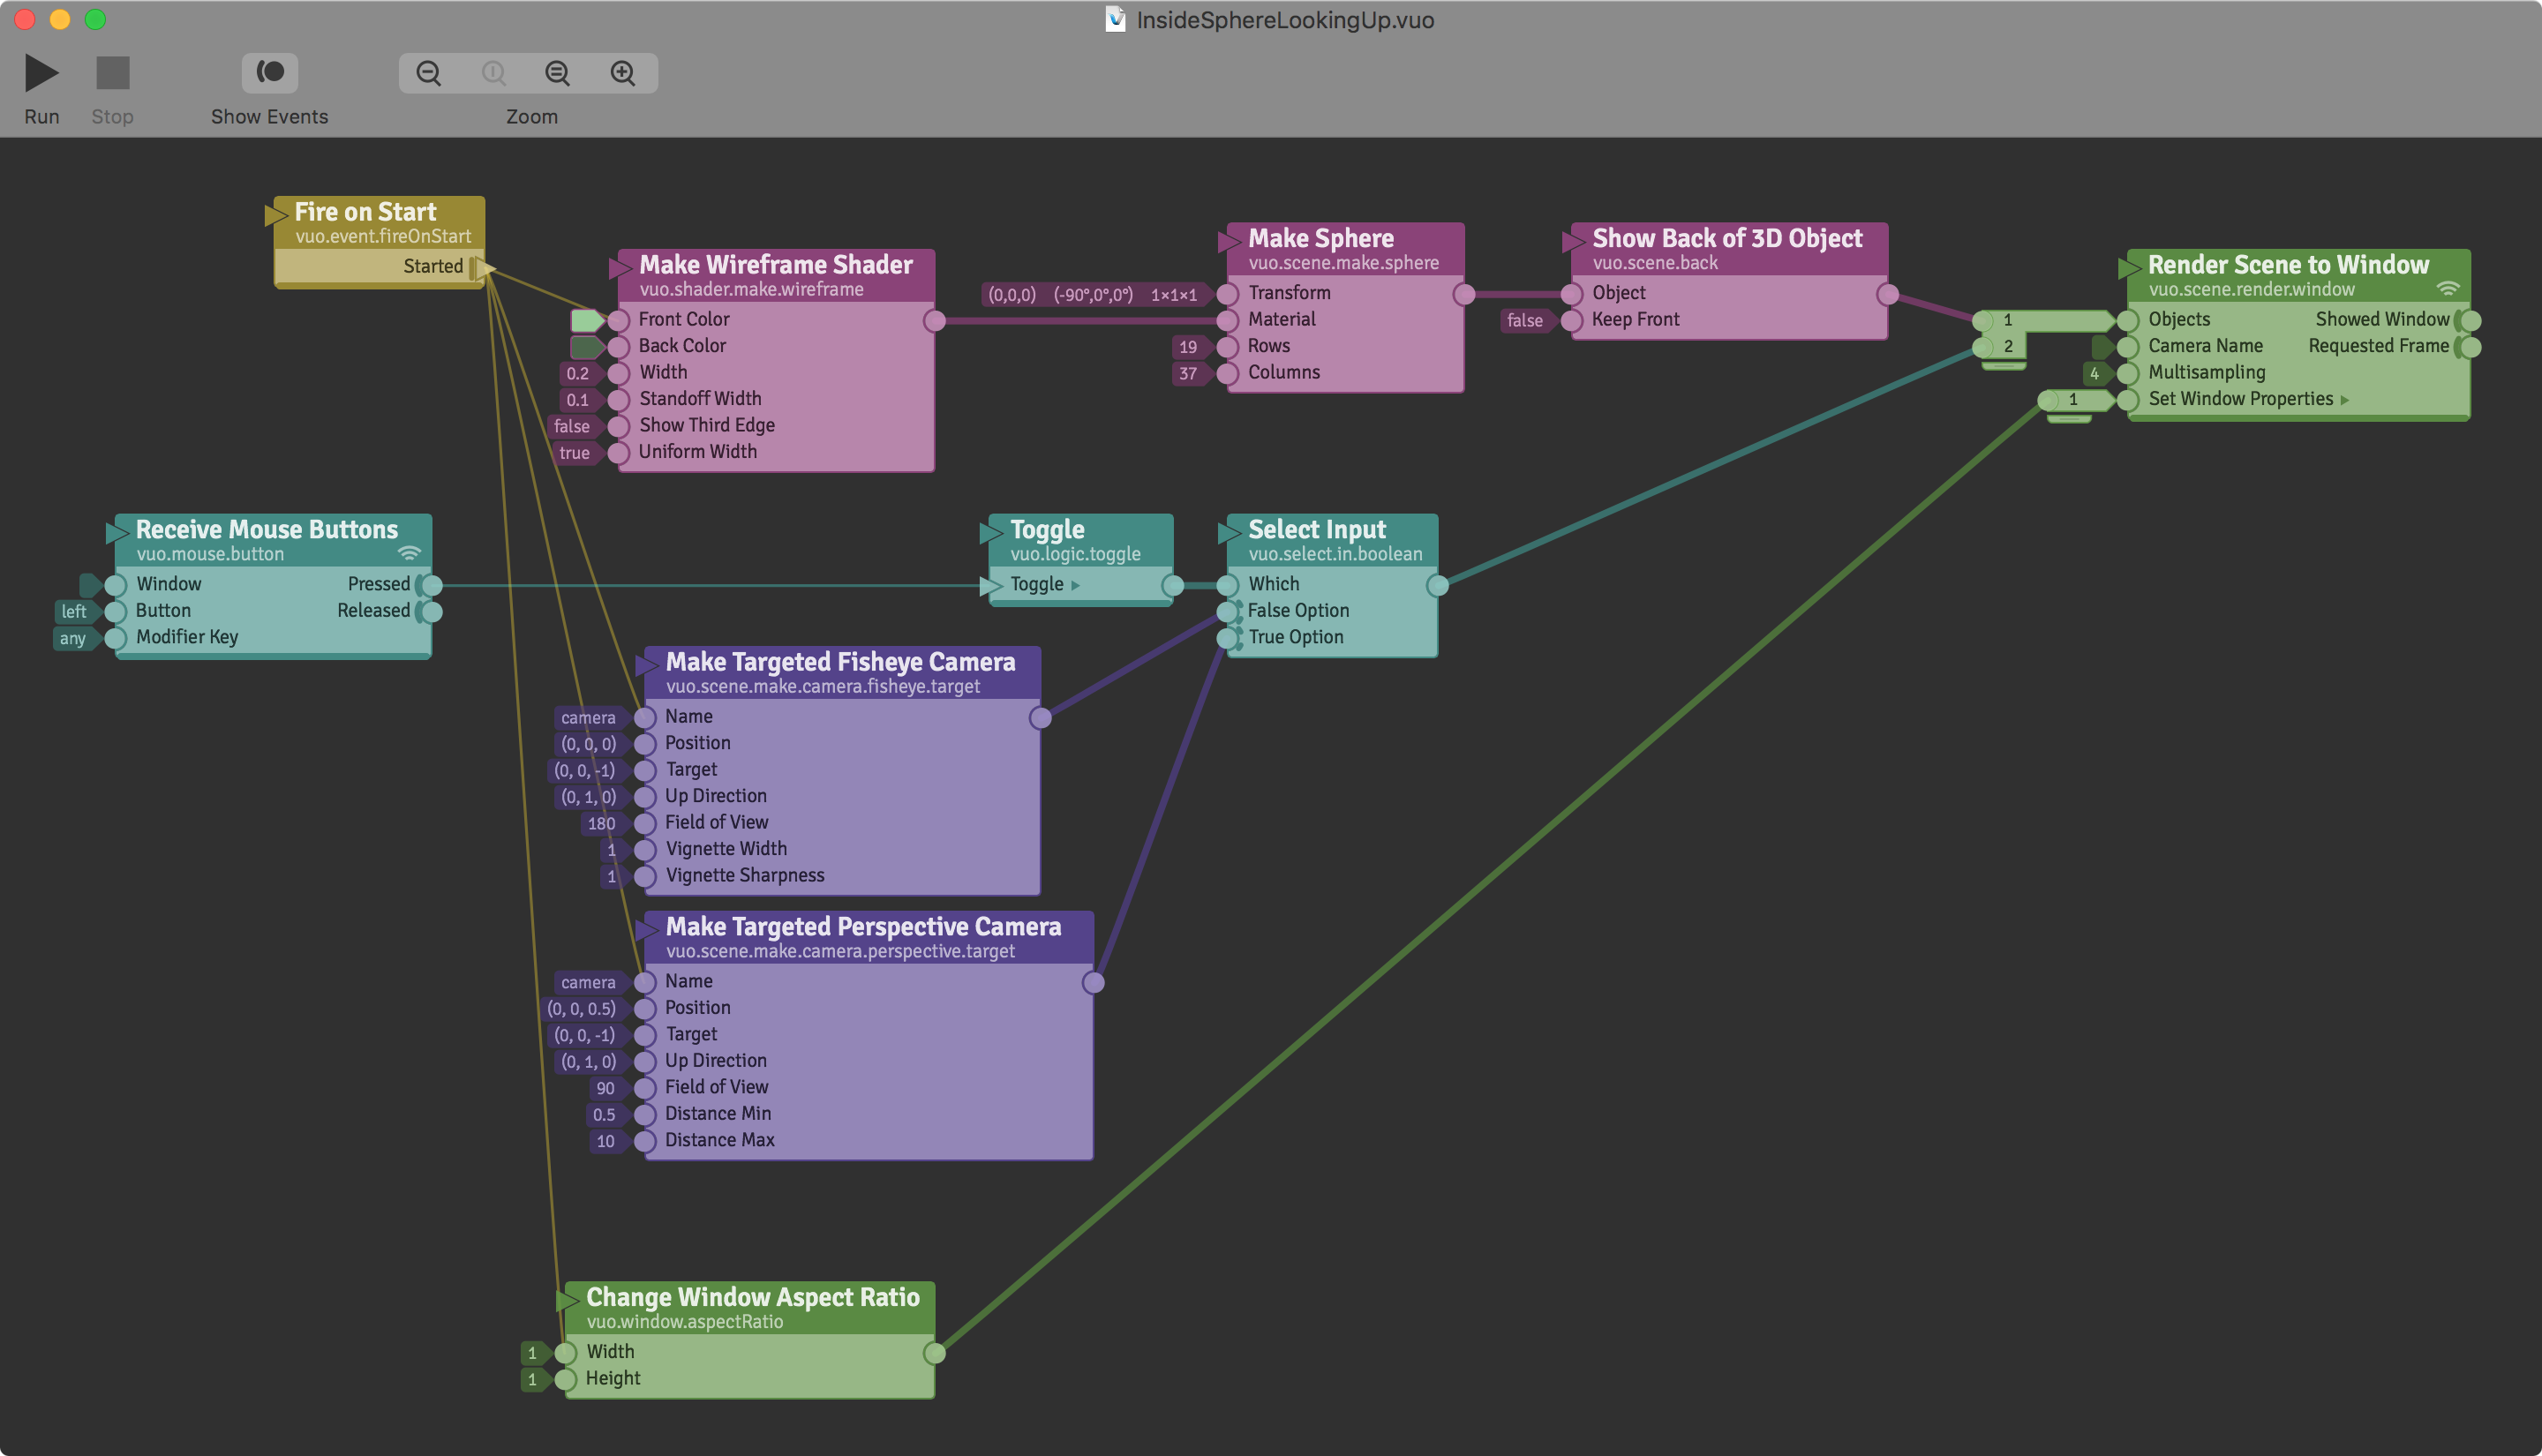
The example below demonstrates rendering a simple 3D scene. The virtual camera is at the center of a wireframe sphere, looking up toward its top. You’re looking at the inside surface of the upper hemisphere.
The “wires” of the sphere’s wireframe mark the latitude and longitude in 10° increments. This is thanks to a little math when setting up the sphere. On the Make Sphere node, Rows and Columns control the number of latitude and longitude lines, respectively. Rows is 19 — 9 lines for 10°S to 90°S, 9 lines for 10°N to 90°N, and 1 line for 0°. Columns is 37 — 17 lines for 10°W to 170°W, 17 lines for 10°E to 170°E, 2 lines for 0° and 180°, and 1 extra line because of how spheres are drawn (there’s a seam in the back where two lines coincide).
The Show Back of Object node is important because it makes the inside surface of the sphere visible. Normally only the outside surface is visible (to save time when drawing the sphere by skipping parts that no one will see).
You can click to toggle between a fisheye camera and a regular (perspective) camera.
Download composition: InsideSphereLookingUp.vuo
Making a dome master video of a 3D scene
This example requires Vuo Pro, since it uses the Make Targeted Fisheye Camera node.
The example below displays a 3D scene viewed through a fisheye lens, and is set up so that you can export it to a movie file. You can run the composition as usual to preview the output (you’ll need to resize the window to make it square). When you’re ready to export it, go to File > Export > Movie… In the Size field, type in a square size such as 2000x2000, choose the other settings as desired, and click Export.
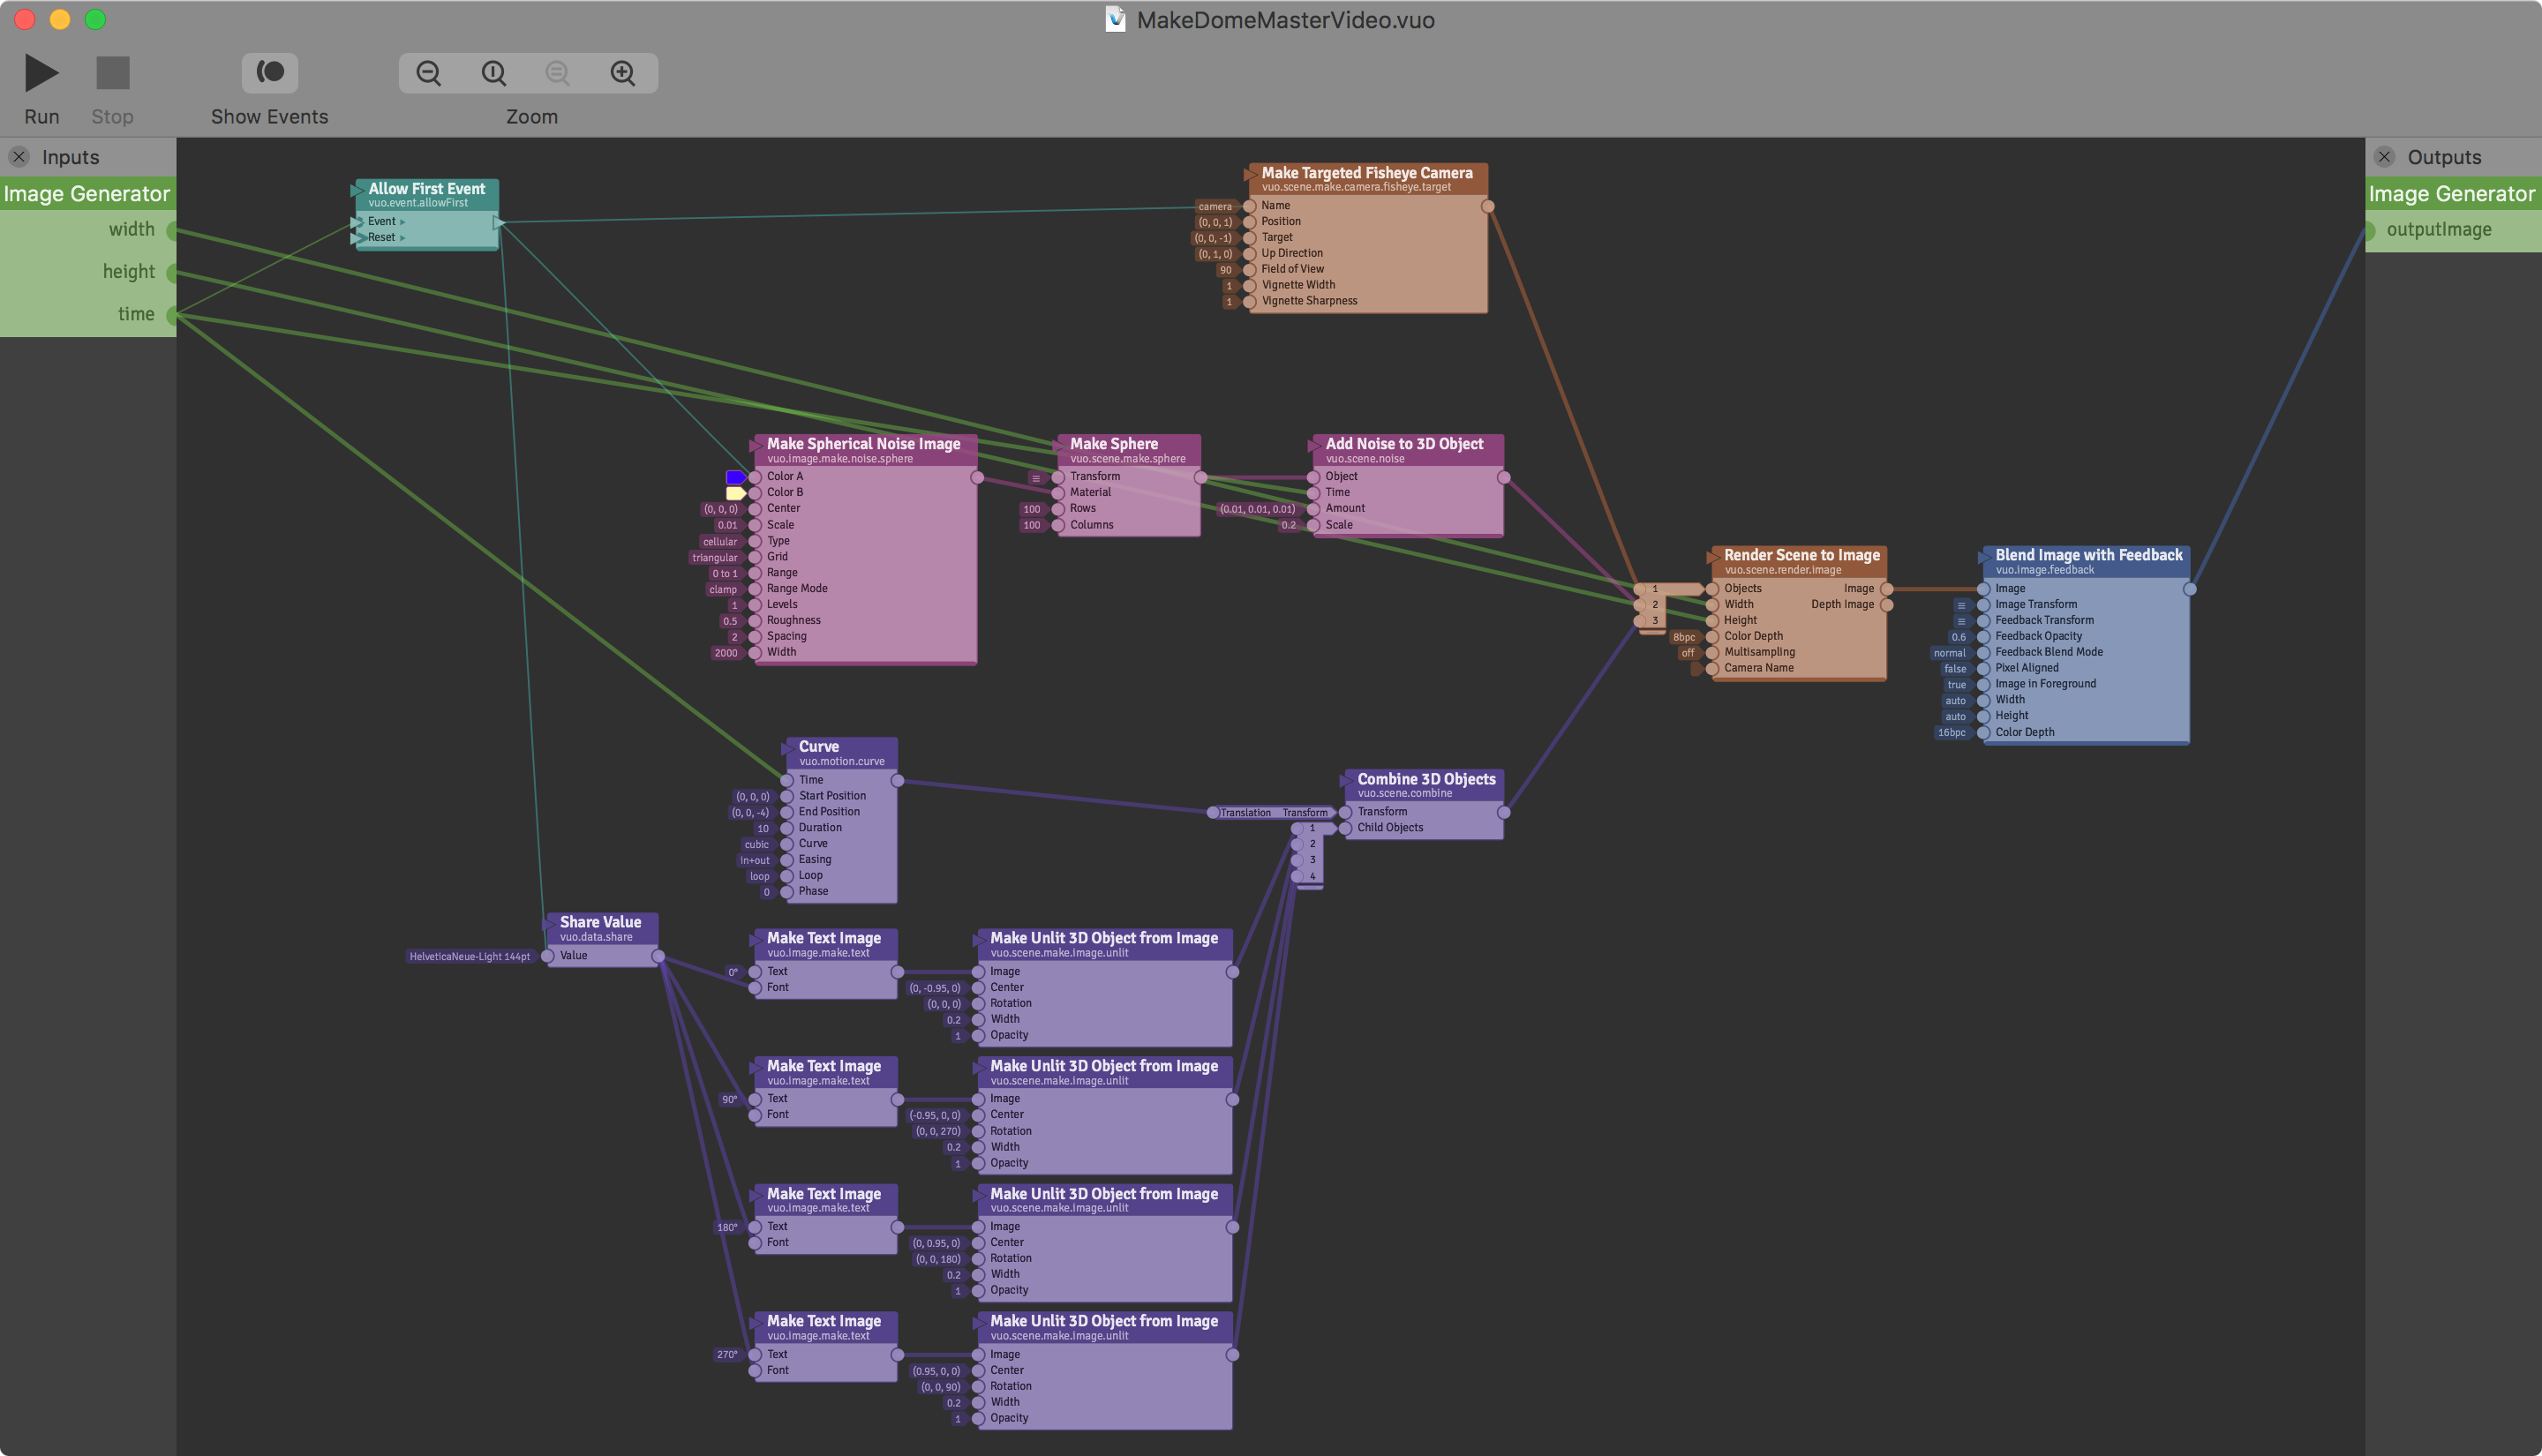
Certain elements of this composition will be in every composition set up to export a dome master movie. One important piece is the published ports labeled Image Generator in the sidebars. You get those by going to File > New Composition from Template > Image Generator or Edit > Protocols > Image Generator. Another is the Render Scene to Image node (orange), which converts the 3D scene to the kind of output required for an Image Generator. The other common element is the Make Targeted Fisheye Camera node (orange), or you could use Make Fisheye Camera instead.
To briefly describe the rest of the composition…
- Magenta nodes — Create the sphere, including the pattern on its surface, and make it wobble.
- Violet nodes — Create the degree labels and make them fly away from the camera.
- Blue
Blend Image with Feedbacknode — Makes moving parts of the composition leave trails behind, most noticeably for the degree labels. - Cyan
Allow First Eventnode — Makes the composition more efficient. Since an event comes in through the Image Generator width, height, and time input ports with every video frame (something like 60fps when running the composition in Vuo), theAllow First Eventnode avoids repeatedly executing parts of the composition that only need to happen once, such as creating the patterned sphere.
Download composition: MakeDomeMasterVideo.vuo
What other people are doing with Vuo
Several Vuo community members have made dome shows and immersive experiences, including:
- A microcosm of Mandurah on Paul Bourke’s Hydrodome
- A virtual forest installation from Gwenyth Dobie and William Mackwood
For more projects by the community, see the community spotlight and composition gallery.